Thursday, October 28, 2010

Battle of Duenas - Move 8

Move 8

1500 to 1600

18 July 1813


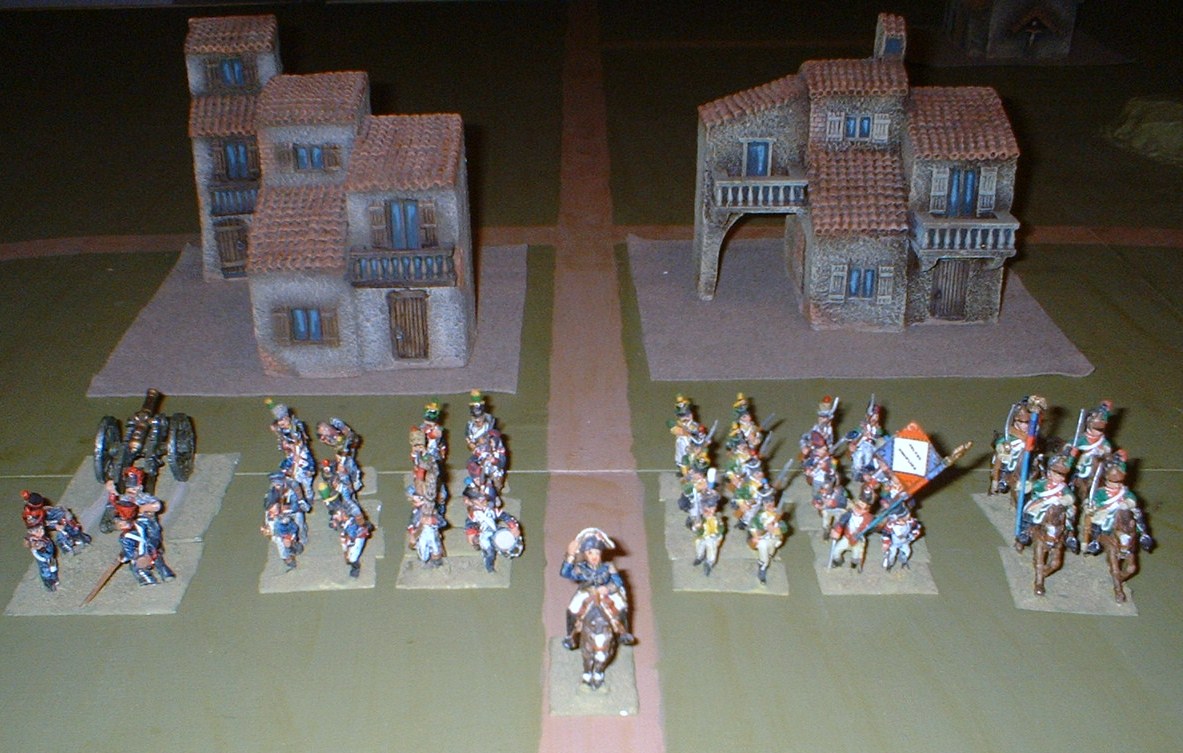
Situation at the end of Move 8

British move first, and Alten changes corps orders to Engage. The gunners score another hit on the nearest infantry line, they fail their morale test and are Shaken. Left hand brigade moves forward into skirmish range and forms line.

French move second. Artillery fire on rifle brigade and miss. Infantry line skirmish, and both sides score one hit. British test morale (roll 1) and rout. French test morale (roll 4) and pass. Shaken brigade test morale (roll 6) and also pass.


The second British brigade routs which prompts Alten to order an immediate withdrawal. With the loss of half of his infantry, and the French rallied, there is no prospect of a victory and a hasty retreat is probably the best option.

Rule Note

Once more a poor morale dice roll has decided the outcome of the battle. We both prefer this sort of result to a game, though it can be a “bummer” when it happens too often.


Effect on the Campaign

This is an unexpected set back for the British. This is their best corps, and they should have taken the village. Had they done so the French right wing would have had to fall back towards Burgos, leaving the garrison of Valladolid isolated. Wellington will have to come up another plan!

Casualties were light on both sides, except for the French cavalry brigade. Both corps will live to fight another day.

Wednesday, October 27, 2010

Battle of Duenas - Move 7

Move 7

1400 to 1500

18 July 1813


Situation at the end of Move 7

The British moved first, fired canister on the Shaken rifle brigade and scored another hit. The rifles tested morale, rolled a 2 and routed through not only the cavalry but also the supporting rifle brigade. Both had to test morale, both failed, both are now Shaken. Things are looking very bleak for Vilatte


French move second. First changed his orders from Engage (which requires that he advance and engage the enemy) to Halt. Artillery fire on British infantry, one hit, make morale. Moved the cavalry out of canister range of the enemy guns and his routed infantry so that they were no longer intermingled with the reserve infantry. Checked morale for Shaken cavalry and reserve infantry. Passed for both, who are now Shaken.


The French have recovered from their rout, but are now in a bad formation to attack, have changed their orders to Halt (in which they cannot initiate any attack) and are still in canister range of the enemy artillery.

Rule Note

One bad morale dice throw, let alone a series of them, can bring the game to an abrupt halt. Normally when supports are Shaken, they lose their next morale test and join the rout. So the French have been very lucky. However this setback has almost certainly cost them the battle. And particularly so if the British advance and fire at them

Monday, October 25, 2010

Battle of Duenas - Move 6

Move 6

1300 to 1400

18 July 1813


Situation at the end of Move 6

With only 5 command points Alten is unable to fully deploy his corps. He moves his artillery within range and unlimbers. On the right he deploys one of his rifle brigades in line and sends them forward. On the left he sends one brigade forward in column of march to make room to deploy both in line.

The French gunners fire canister at the riflemen, score a hit and leave them Shaken


The rifle brigade in line is Shaken. They are still in canister range of the enemy artillery, and if they have another hit will probably rout. If they do they will affect every brigade within 4”,
which would include the cavalry, artillery and supporting rifle brigade.

Rule Note

Normally a brigade of rifles would expect to take one casualty and still remain Formed. However when this one tested for morale he rolled a 1. He needed a total of 3 to pass his morale. He got plus 1 for supports and minus 1 for a casualty. If he had got one less he would have routed.

Sunday, October 24, 2010

Battle of Duenas - Move 5

Move 5

1200 to 1300

18 July 1813


Situation at the end of Move 5

Unable to deploy in the valley, and confident in the cavalry screen, Alten has taken the risk of moving his corps very close to the enemy still in column of march.

Leval has withdrawn his battle line back to the Vilada road and deployed most of his infantry in line


Rather than deploy in two lines of column further back, Alten has marched his whole corps clear of the valley, and very close to the French, still in column of march. None of them, except the cavalry, can fight in this formation. If the French cavalry had not been routed they would not have dared to take this risk.

Saturday, October 23, 2010

Battle of Duenas - Move 4

Move 4

1100 to 1200

18 July 1813


Situation at the end of Move 4

The British cavalry have moved closer to Duenas, to be out of the angle of fire of the French artillery. The remainder of the corps continue to move forward in column of march. With the loss of the enemy cavalry there is no threat to them in this formation, and they can move faster.

The French chasseurs failed to make their morale and continued to rout off the table.

All of the French infantry are now in position, but have formed square as protection against the enemy cavalry.


The French infantry have formed square as protection against the British hussars. At present this is a wise move, but as the enemy infantry move closer they will be at a distinct disadvantage in this formation.

Rule Note

Cavalry can not charge Formed infantry in square. However such infantry are at a great disadvantage against enemy infantry whether in line or column.

Friday, October 22, 2010

Battle of Duenas - Move 3


Move 3

1000 to 1100

18 July 1813


Situation at the end of Move 3

Alten changes his orders to Engage, so that his cavalry can charge the chasseurs. The enemy fail to make morale to react and are routed with three casualties. Alten moves the remainder of his corps towards the enemy.

The hussars finish their charge move within range of the French artillery, who fire but miss. The infantry form square to protect the gunners from the hussars.


The garrison of the farm on the left flank have now reached the village. They move through Duenas to avoid the enemy cavalry who are within charge move.


Rule Note

A brigade charged in the rear must make its morale to turn and face the enemy. If they fail to do so they are routed and lose three casualties. The enemy are Disordered for the remainder of that move.

Thursday, October 21, 2010

Battle of Duenas - Move 2

Move 2

0900 to 1000

18 July 1813


Situation at the end of Move 2

The French moves first. Leval left his cavalry and used all of his CP to get the garrison of the farm on his left back to Duenas.

Alten was able to move his cavalry within charge move of the French chasseurs without a multiple move. The remainder of his corps are advancing towards Duenas behind the cavalry screen


Altens corps approach Duenas

Infantry can move much faster in column of march, but they cannot fight in that formation. So it is important to have deployed cavalry in front to cover the advance. Alten’s corps will soon have to deploy into column of attack or line, both of which move much slower.

Rule Note

Because the British hussars are within charge move of the enemy cavalry, they will be able to declare an Opportunity Charge at the start of the next French move. They will have to pass a morale test of at least 4 with 1D6 in order to do so.

Wednesday, October 20, 2010

Battle of Duenas - Move 1

Move 1

0800 to 0900

18 July 1813


Situation at the end of Move 1

On the left Alten makes good progress with his corps advancing in column of march and the cavalry screen in line.

On the right Leval has ordered his cavalry back to Duenas. He then rode to the farm on the French left and ordered the garrison to return to the town.


Rule Note

Alten is able to move so fast because his corps are all within 2” of each other. This allows the whole corps to move for just one Command Point. However it takes a second to move his cavalry screen, who are not within 2”, and a third to move himself. If his corps were more dispersed it would cost seven Command Points (one per brigade and one for the commander) to move them.

To order his garrison back to Duenas Leval has to be within 8”. It takes three moves to get them out of the farm. First move they gather in the centre, second they move to the edge they wish to leave by and third move they march out of the farm. The farm building has been removed to show the formation the garrison are currently in.

Monday, October 18, 2010

Battle of Duenas - Set Up

Start 0800

18 July 1813


Battle of Duenas

Campaign Background

General Leval has orders to hold the village of Duenas to protect the main road from Santander to Palencia, along which the Italian corps are due to arrive within 48 hours.

Wellington is determined to use General Altens corps to take Duenas and delay the Italians. Altens corps, which includes the two light brigades, is the best in his army and he is confident that they can take the village.

The battle starts at 0800 18 July 1813.


Table at start of game

Wargames Table

Duenas is the village at the right of the table

The other two buildings are farms

The road top to bottom is from Santander to Valladolid

The road left to right is from Mudarra to Palencia

Levals 6th French corps is deployed on the right of the table

They have orders to hold Duenas

Altens 4th British corps will enter the table on the left on blinds

He has orders to attack Duenas


Game Notes

This the first game we have played with our newly amended rules

As the game starts Leval has ridden forward with his cavalry brigade to determine the line of the British advance.


Rule Note

Another advantage of Leval being so far forward is that it reduces the number of multiple moves the British can take. They are not allowed to have a multiple move which brings them within 16” of an enemy brigade.

Wednesday, October 13, 2010

Fifth French Army

Summary of Fifth French Corps

Both French and British generals are very good. However one French general has been graded as Poor to give the edge to the British.

The infantry of the three French corps are equal in ability.

The first infantry brigade in each corps is elite, with excellent morale and skirmish ability.

The Italian corps is weaker in all respects.

There are no class A for firing in the French, this will give the British a slight edge on firepower.

All of the French artillery have longer range than the British. But the 12 pounder has the longest range of all.

All of the cavalry are class B, so should have an edge in any cavalry engagement with the British.


CinC – Marshal Soult (Gifted)


Marshal Soult with his corps commanders


6 French Corps – General Leval (Average)

21 Infantry Brigade CA FB SA

22 Infantry Brigade CB FB SB 1 cas

23 Infantry Brigade CB FC SB 6 cas

24 Infantry Brigade CC FC SC

5 Cavalry Brigade CB Medium 3 cas

5 Foot Artillery CB 9 pounder


6th French corps

7 French Corps – General Villate

25 Infantry Brigade CA FB SA

26 Infantry Brigade CB FB SB

27 Infantry Brigade CB FC SB

28 Infantry Brigade CC FC SC

7 Cavalry Brigade CB Light

3 Corps Artillery CB 12 pounder


7th French corps

8 French Corps – General Sarrut (Average)

29 Infantry Brigade CA FB SA

30 Infantry Brigade CB FB SB

31 Infantry Brigade CB FC SB

32 Infantry Brigade CC FC SC

6 Cavalry Brigade CB Medium

4 Corps Artillery CB 9 pounder


8th French corps

16 Italian Corps – General Meret (Poor)

13 Infantry Brigade CB FB SB

14 Infantry Brigade CB FB SB

15 Infantry Brigade CC FC SC

16 Infantry Brigade CC FC SC

4 Cavalry Brigade CB Light

5 Corps Artillery CB 9 pounder


16th Italian corps

Monday, October 11, 2010

Anglo-Portuguese Army

Summary of the Anglo Portuguese Army

Wellington is both the CinC of all allied troops in Spain, and the CinC of his own Anglo-Portguese Army.

Although Wellington’s historical army were organised as divisions, I have used corps to keep a standard form of chain of command throughout all armies in the campaign.

Each corps has four infantry brigades, one cavalry brigade and one artillery battery.

I wanted each army to have a mix of good and bad points. This was difficult to achieve with the British, who historically has good morale, good firepower and good skirmish ability. But to give them all these advantages would make them “supermen” and very difficult to beat on the wargames table.

So the fourth infantry brigade in each corps, the Portuguese, are all shown as poor morale, poor firepower and poor skirmish ability.

In addition one of the British infantry brigades are shown as poor morale/training.

All of the cavalry are shown as poor. This is a little unfair, but it does mean that there is a serious weakeness in each corps.

Finally all artillery are shown as 6 pounders. This means that the French artillery will always have a longer range as they are all 12 or 9 pounders.


CinC - The Duke of Wellington (Gifted)


Wellington and his corps commanders

1 Corps – General Hill (Average)

1 Infantry Brigade CA FA SB

2 Infantry Brigade CB FB SB

3 Infantry Brigade CB FB SB

4 Infantry Brigade CC FC SC

1 Cavalry Brigade CC Light

1 Foot Artillery CB 6 pounder


1st British corps

2 Corps – General Cole (Average)

5 Infantry Brigade CA FA SB

6 Infantry Brigade CB FB SB

7 Infantry Brigade CC FB SB

8 Infantry Brigade CC FC SC

2 Cavalry Brigade CC Medium

Corps Artillery CB 6 pounder


2nd British corps

3 Corps – General Picton (Average)

9 Infantry Brigade CA FA SB

10 Infantry Brigade CB FB SB

11 Infantry Brigade CC FB SB

12 Infantry Brigade CC FC SC

3 Cavalry Brigade CC Medium

Corps Artillery CB 6 pounder


3rd British corps


4 Corps - General Alten (Average)

13 Infantry Brigade CA FB SA

14 Infantry Brigade CB FB SA

15 Infantry Brigade CC FB SB

16 Infantry Brigade CC FC SC

4 Cavalry Brigade CC Light

Corps Artillery CB 6 pounder


4th British corps